Stats

Facebook

Comments

Featured Posts

Kamis, 11 Oktober 2018

How to Conserve Photos With Image Restoration

- 4 komentar
Conserve Photos With Image Restoration

Photo repair is only preserving old recollections and passing on the lovely memories to another generation. Photos are taken up to capture an instant of an eternity. The problem with the old photos is the technology and the chemicals which were used to build up them, they respond to light even after quite a while, this propensity of the light response results in staining and the photos have a tendency to look faded and the product quality and the appearance of the picture is lost. 

Old photos can be considered a good candidate for photo recovery. The images can be cracked, smashed, broken or faded; the procedure of restoration may bring back the product quality picture that you once got. If all of your photos are discoloured or faded, you can restore the picture with the picture technology and makes it look superior to the original picture itself. 

A professional can restore your old photos and can make sure they are appear to be new and filled with life. The picture doesn't have to be completely damaged to test this process. You can find many things you can certainly do to your picture that makes it look different. 

For instance, if you have a vintage picture that is boring and in dark and white, you can get the picture in color and make it look different and radiant. Yet another way to produce a picture look different is to have a dark and white picture and color some elements of it and leave some in dark and white to provide it a refined effect. 

Another approach to restoration is to eliminate any unwanted materials in an image. For instance you can remove any indications or unwanted folks from the history and also have the perfect picture which you have always needed that may be seen by your loved ones. One benefit of having photo repair done to your old photos is that, the initial photo is still left as is, you will simply need to check the picture and convert it into digital media and focus on that duplicate and leave the initial photo unaltered.

This technique of scanning your old photos and getting them restored is named digital picture restoration. It really is truly an artist's job. You can brighten the picture, lighten it, form the edges, slice the sides, and remove unwanted materials from the image. There were times where you'd to find a location that occupies such types of jobs and then take the photograph to the shop and tell them what must be done. 

As time goes on the procedure also changes, digital picture recovery is cheaper and simple to use. The process is becoming so simple, you merely need to sit down before a pc and scan the pictures that require to be restored and send it to a picture shop and tell them what must be done and they'll get it done and send it back an email. You may get your photos restored and make sure they are look new and make a few changes and make sure they are look different.

You can also gift a pal or a member of family a vintage photo after recovery which will be cherished for long, not the same as the everyday presents. These are always appreciated which is a terrific way to tell them how much you treatment.

Jumat, 05 Oktober 2018

Guide to find the Best Digital Image Printer

- Tidak ada komentar
Best Digital Image Printer

The grade of image resulted by camera is influenced by its resolution, the bigger resolution the better image will be resulted, however when you print your digital picture in some recoverable format, your picture print won't certainly as effective as your digital photo. The grade of photo printing is inspired by the grade of computer printer. So if you would like to get high quality picture print out, you can go directly to the digital picture development shops but it'll break your pocket. Just how can you printing digital picture with high quality picture print out without breaking your pocket? Just invest your cash in the best digital picture printing device.

Today there are extensive camera printers in the marketplace. They include various brands, features and prices which will make it hard to look for the best digital picture printer that suits your need and budget. Here are simple tips that will show you to look for the best digital picture printer that matches your preferences.

Think about what size your designs is going to be

If you're happy with printing 4x6 photos, you then don't need to buy an expensive, large format computer printer. Nearly all basic level printers can certainly printing on regular US notice paper size, plus unless you intend to expand your photographs, it'll be better so that you can use a simple digital photo printing device.

Inkjet technology or Dye Sublimation technology?

This query is the most crucial to be thought about prior to choosing the right digital photo computer printer. When you have intend to printing both photos and text message, the best option is using printing device with Inkjet technology. This sort of printer functions by growing tiny spots of printer ink through nozzles on printhead. But if you have intend to printing only photo designs, the best option is using computer printer with Dye sublimation technology. This sort of printer uses temperature to transfer dye onto thicker paper for example picture printing device paper, fabric or credit cards. Nonetheless it is more costly than the Inkjet technology and the consequence of photo print out is also superior to the Inkjet technology.

Estimation how much quality you'll need

The word of DPI (dots per inches) make reference to the number of printer ink dots the printing machine employs per inch to create images or text message. The bigger the DPI, the sharper, clearer, more brilliant and details your photo print. The typical to end result high quality picture print out for Inkjet computer printer is approximately 2,400 DPI and 300 DPI or less for a dye sublimation computer printer.

Study printing device reviews

Consumers who've purchased printers generally send reading user reviews in technology sites. Research and analyze digital picture computer printer reviews, and even ask your pals related with their applying for grants the printing device you want to choose.

Notice distinct features

A whole lot of extra features are given in the newest digital picture printers, which can make you have a lot of options to experiment with. Several printers possess memory space card slot machine games, therefore all you have to do is merely place your digital camera's or even your cell phone's storage credit card within the printer's slot machine to become able to printing photos. The living of LCD display screen will very help you edit the photos preceding to printing. The PictBridge feature will allow you to straight print picture by hooking up your camera right to the computer printer through USB slot machine, and you don't need to upload the picture onto the computer prior to printing.

Consider extra costs

If you would like to conserve additional money, you have to use your own digital picture printer. If an ink cartridges go out, you will see the printer ink cartridges more costly. Or if you want to printing quality picture with special picture papers, it will cost a lot more money for those.

Make sure that the printer's printer ink cartridges plus picture printer paper won't cost higher and affordable. Several printing devices still work very well with third-party printer ink cartridges, so that it will be easier to confirm if the printing device you are hunting will continue to work as well as those.


Kamis, 04 Oktober 2018

7 Facts About How To Take Photos At Night

- Tidak ada komentar


Now you are reading article about 7 Facts About How To Take Photos At Night

Whether you're utilizing a cellphone, an electronic point-and-shoot camera, or a pricey SLR, you'll take far better photos when you find out more about light as well as your camera.

Taking photos with a flash often provides unattractive results. Washed-out, toned, phony-looking encounters with monstrous make-up can wreck your recollections of any special event. The rest is so dark it's worthless. Here's how to consider great, natural-looking portraits and photos in low or suprisingly low light. While written for digital camera models, many old film cameras may use these pointers, too.

The entire strategy is control or compensation for low light, and using some simple built-in controls on your camera. Much like any new tool, the main element to getting these to work how you want is practice, practice, practice.

For light, you can deliberately place your camera to flash, or never to flash. Understand how to turn from the flash and use day light to get better results. The typical icons are a lightning bolt (flash always fires) and a lightning bolt with a club through it (never flashes). Take one picture with flash, then another without flash, and you will instantly start to see the huge difference.

Modern flashes make an effort to compensate somewhat for distance, but too close continues to be too close, and too much is still too much.

Because of this article, you can forget the 'eyesight' icon (fires the flash rapidly several times to shrink the subject's pupils, eliminating 'red eyes' then fires one final time to have a photo). Prevent the 'car' placing, which automatically decides whether to fireplace the flash or not, with respect to the available light. You can find other configurations (a moon and superstar icon may be considered a quick, convenient 'evening' setting up -- check it out).

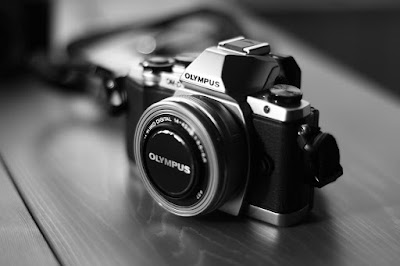
First, obtain your camera manual. For many individuals, it's much simpler to have a searchable smooth copy (click on the 'binoculars' icon) on your hard drive than to find and thumb through a difficult copy published manual. Many cameras don't even feature a published manual nowadays; it's on the Compact disc. To download your gentle duplicate as a searchable Adobe Acrobat PDF document, just Google the name and style of your camera and manual PDF. Which means that your Google key phrase might appear to be this: olympus fe-47 manual download pdf

Some cameras have built-in, detailed Help displays for popular features. Many have screen screens that provide an array of valuable automated configurations. Check yours.

Become acquainted with a few of the settings, which differ predicated on model. Test and test before you will need these configurations which means you can learn what your camera can do as well as how to do it. A lot of the configurations you will discover can be overlooked -- they're for another thing. Established the camera's clock as long as you're in there as well as your photos will all be time- and time-stamped.

Changing the ISO or ASA rate establishing from 'auto' to a higher amount makes the camera a lot more sensitive to light. In the event that you go through the inner information in photos you've used, it probably includes the 'film acceleration' the camera used. 100 and 200 are normal. Lower amounts mean there's a lot light you are able to toss some away to get wealthy, deep colors and eliminate blur. Personally pushing the increase to 1600 means you press just of the meager light for those its worthy of. You'll sacrifice some color range and depth, however your photos will not be a blur of dark shadows. Do not forget to change it out back again to 'car' if you are done or the next photos will be too shiny. Some cameras get back to 'car' when you convert the camera off. Test yours. Film users can purchase a move of high-speed film if you understand you will need it for low-light pictures.

Prop the camera against a stationary subject. A seat, a desk, a wall structure, anything to limit blur from camera motion.

You are able to choose Shutter Speed and Aperture settings on better cameras and everything SLR's. Long shutter openings (1/8 second, one-eighth of another, 125 milliseconds) let in a lot more light, but are easy to blur. Brief times (1/100 second) stop blur but need a lot more light. You might choose the aperture (size of the lens starting) to regulate light, while also managing the 'depth-of-field' or selection of concentrate. Small aperture, (high f-number, f-16 or f-22) long depth of field enables you to get foreground and history objects obviously in concentrate but requires much light. Large-opening apertures (f-2 or f-5.6) narrowly limit the concentrate to your subject matter, blurring the rest, but use much less light. Get creative, understand how they work, and also have more control over your photos.

So, firing 1/8 second at f-1.4 will need maximum benefit of the available light, but will be blurry and out of concentrate if you don't genuinely just work at it. These email address details are much simpler to obtain in the camera than later with software. Again, practice makes perfect.

When you have an 'image stabilization' feature, it could or might not force on the flash. Test yours to see when you can enable it with no flash but still get some good stabilization.

Focus on the prevailing light and the lights in the area. You can significantly enhance the light on your subject's face simply by having them step apart a few ft. If the light is straight over head, deep shadows on the eyes can look ghoulish -- keep these things step back a little for an all natural look.

Find the settings for color balance. If not established properly, photos used under incandescent lights will be too red or orange, fluorescent lights can make everything green or blue. For easy and simple fix, just go through the image screen to complement up colors with the area as you scroll through the colour settings, find a very good one, and press the shutter. Road lights, stage light, neon lighting and other unusual lighting gives vastly greater results if you merely select the best-looking placing available.

Get yourself a tiny 5-inch tripod, around $5 on eBay and other retailers. Create your shot (film swiftness, color balance, zoom, etc.), place the camera on the tripod on the desk, start the 10-second timer (entirely on almost all cameras) and allow camera press the shutter release so that you can eliminate all camera jiggle. Show your subjects the way the camera will alert them right before it takes an image. Some people just like a monopod, a collapsible, full-size tripod that's lacking two hip and legs for easy, low-light, handheld photos.

In case your camera has a contact lens, here is a trick you may use. Push the flash on, but cool off from your subject matter. Zoom directly into make their encounters fill the framework. You may get significantly less flash, but fundamentally the same image. Using more day light will make epidermis shades truer and softer and make the environment better exposed rather than black. Check it out.

The flash works from the very least 5 feet to maximum 10 feet away, and that means you get completely different results by moving back simply a few feet. This does mean utilizing a flash for topics over 12 foot away just makes the camera arranged itself wrong. If you are taking photos while sitting behind the 4th row of the auditorium, change the flash off to progress results, because the flash does not have any effect in any case (except to significantly overexpose the trunk of the top on the individual near you) and makes the camera think there's a lot more light about them than there happens to be.

Contain the camera at the height of your subject's face. ' Barrel distortion ' occurs if you are standing as well as your subject matter is seated. It actually makes them fats. Many people hate to have their picture used because they always look unwanted fat (because they're always seated). Kneel right down to capture those photos. Your photos will most likely be more interesting if you zoom in or move nearer to fill up the body with encounters, unless the backdrop is important. People prefer to see encounters, not toes.

When you have an SLR, you might have an exterior flash with a swivel mind. Point the flash up at a 45-level angle so that it factors to the roof halfway between you as well as your subject. That is called 'jump flash' and provides a softer, more satisfying overall effect. You can even test out diffusers, tissues, a handkerchief and other items within the flash to subdue its power you need to include more day light. A sensor inside the lens may make up for the low light, or the sensor may be on the flash -- don't cover that up. See your manual.

Some final tips. Make your photos more valuable by including -- or excluding -- history and environment by using zoom, changing your situation, or moving your subject matter. Have a few pictures; one will usually look much better than the others. Alert people when to smile so they'll look better. Don't make people wait around (permanently) when you have a snapshot or they don't smile or enable you to take their image.

Digital camera models have a short lag between your time you press the shutter and as soon as they actually take the snapshot. Camera reviews often rate this lag time, and shorter is way better. To pay, some cameras have a 'sports activities' placing that shoots 5 (or even more) structures in fast succession which means you can start just a little early but still get a good shot from the series.

You probably curently have some photo editing and enhancing software on your pc, and it could include 'auto-fix' or manual brightness and contrast modifications, cropping, and other useful things you may use to boost your photos.

Don't trouble buying Photoshop unless you're really dedicated. It's an enormous, expensive, complicated bundle intended for specialists and incredibly serious amateurs that requires a few months to learn. There are many free and under-$20 software programs that are far better for informal and serious photographers. Google picture editing software review download free or similar conditions to discover a good one for your requirements and capability. Online photo journal sites and hard duplicate magazines from the library are excellent for reviews.

Talk about your photos online so others can enjoy them. In the event that you email them copies of the photos, they'll fill their Inbox and become difficult to see, find, organize or revise. Instead, if you email them a web link to the photos, they'll see any new ones you add later, you can organize them into albums, make remarks, improvements, etc. Consider ShutterFly.com, Flickr.com, or PhotoBucket.com. Friends and family can still download them and printing on their computer printer, or order mugs, T-shirts, prints, posters, etc. They are writing services, not back-up services.

Type your photos on your pc. Some individuals use folder brands like C:Photos, then 2010 January, or 2010 Party at Bobs, or 2010 Easter with grandkids, or Business and Personal, or any structure that can help you see them later (placing the entire year first will alphabetize them by yr). Many systems enable you to add Tags that searching for later, irrespective of where the picture is. You might wish to established the folder properties showing you small picture Thumbnails rather than filenames (Home windows Explorer's View menu). You might make copies of the most crucial ones and rename (press F2 or right-click) the filenames, then click-and-drag those into one folder.

Last, however, not least is burning your photos. In case your hard drive accidents (each of them do ultimately) or your personal computer is taken, lost, damaged, fallen, etc., you'll instantly lose all your valuable photos. Consider an internet back-up solution (Google mozy free personal to get 2 gigabytes of free, computerized storage space; enough for a large number of your individual photos). You might copy these to an exterior hard drive or another Computer, but a fireplace, overflow, theft, lightning or other devastation could mean shedding all copies. Fumes from painting an area or other chemistry has been recognized to trash hard disks.

Tips for Firing Great Digital Photos


Wish to know THE biggest key to taking good digital photos? Well here it is: It is the photographer that will take great photos, not the camera. Consider that for one minute. It's true isn't it?

I've seen some individuals take great photos with a straightforward point-and-shoot camera, although some take lousy photos with expensive SLR.

But fret not. Read these ten tips about capturing digital photos and apply them next time you have an opportunity. Before long, you will be shooting such as a pro! 


1. Using the Display for Outdoor Portraits

Here's one of my very best secrets on taking great photos - using the fill up adobe flash or display on mode. Hardly any people know that you can (and really should) manage the adobe flash when capturing outdoor pictures. Figure out how to control the display so it continues on when you wish it to, not when the camera deems it appropriate, I promise you could start attaining better outdoor pictures.

An excellent technique is to place your model in the shade under a tree, then use the flash to illuminate the topic. By keeping the topic cool and comfortable, you'll receive a more calm looking portrait. 


2. Watch that White Balance 

The default white balance setting, which is defined to auto for some digital camera models, can cause problems in your shots. There is that departing the white balance environment on car may leave your digital photos a little on the 'cool' aspect.

The next time you're shooting outdoor portraits and sun-drenched scenery, try changing your white balance setting from auto to cloudy. This modification is the same as putting a slight warming filter on your camera. Achieving this escalates the red and yellowish tones, leading to richer, warmer pictures.


3. Test out the Macro Setting 

A neat portrait digital photography technique is the macro setting. Figure out how to activate the up close setting on your camera, usually symbolized by a bloom symbol. You will be surprised at the various perspectives you can get on simple, everyday items when they're framed in macro mode.

Get as near to an object as your camera allows. Once you have found something to your preference, contain the shutter button down halfway to permit the camera to target. Only depress the shutter completely down when the confirmation light provides you the just do it. 


4. Contain the Camera Level 

Keeping the Camera level with all the LCD displays can be an important part of taking great digital photos. The next time you're going for an outdoor shot, try looking for the horizontal lines in character and utilize them as manuals. An example is by using a remove of land, or simply the horizon. Practice level framing of your pictures and as time passes, the process can be more natural for you. 


5. Polarized Pictures

 Attaching a polarizing filtering to your camera is strongly suggested for landscapes and total outdoor shooting. This sort of filtration system reduces glare and unwanted reflections - leading to richer, more saturated colors, in your photos.

In case your camera can't accommodate a polarizing filtering, you'll be able to try out this little trick which I am using for a long time on my point-and-shoot camera. When you have a set of quality glasses, then you need to them off and utilize them as your polarizing filtration system! Place the eyeglasses as near to the camera lens as

possible and make sure the rims aren't blocking the shot. Check it out, it works. 


6. The Tripod can be an Essential Tool

Please keep in mind this suggestion. Tripods are an important tool to every professional photographer and really should be utilized when necessary. They aren't limited to 'professional' photographers (a common misconception). What makes tripods a great accessories? Because they lend balance for an in any other case jittery shot.

The problem is that some tripods are pretty bulkly to transport around. Well, you might try the UltraPod II by REI. This small, flexible, ingenious device ties in your back again pocket and allows you to stable your camera in a number of situations. I believe it applies to about $15. 


7. Learn to Utilize the Self-Timer 

Are you taking so many photos you are missing from your loved ones picture albums? Well, here's the answer - the self-timer. Sure, you could hands your camera to strangers when you leap in the shot. But you need to get worried about them falling it or working off with it!

With all the self-timer, first find a good steady surface to put the camera and compose the shot. Make certain the concentrating sensor is targeted at a person in the group rather than the distant history. That way, the pictures will come out nice and sharpened.

Another way to use the self-timer is to make long exposures of cars driving a vehicle more than a highway at night. Simply secure your camera on the tripod, then trip the shutter using the self timer. 


Selasa, 18 September 2018

How to Choose the Perfect Image for an image Gift

- Tidak ada komentar
How to Choose the Perfect Image for an image Gift
Because of digital technology, you don't have to set you back the store and get a film developed. Eliminated are the times of storing photos in dusty picture albums or ignored envelopes. We are able to snap pictures anytime, anyplace and talk about them to your heart's content. We are able to post these to websites and sociable mass media sites, and store a large number of them on our hard disks.

Taking a picture is easier than ever before, as is keeping them; but nonetheless, our images tend to be overlooked - on our computer systems rather than in albums. Thankfully, there are companies that may take your most valuable photos and utilize them to generate custom photo presents that may be kept for life, allowing your photos to be celebrated rather than shelved. Photos can be highlighted on countless items, and do not consider mugs and t-shirts: family heirlooms, picture blankets, jewelry, clocks, and a great many other items can be changed into an individualized gift with your preferred photo. These presents can get for just about any occasion and are a distinctive way showing someone how much you caution.

Quality Counts

So with each one of these options, which images work best on the personalized present? "This will depend," says Brian Cash, Founder of Printable Recollections, an organization that makes custom photo presents. "Some photos work very well on large-format published items such as blankets; others are better on smaller parts like pendants or bands. A lot is due to the entire image quality - our designers could work with photos of lower quality, but there's only a lot we can do to bring clearness to a blurry or pixilated image." Cash suggests using top quality images for blankets, pillows, and other bigger items. "Mobile phone pictures could work, especially those used with the newer smart mobile phones because the camera will take better photos than prior years. But these photos used with phones remain best on jewelry, our small containers, wall structure clocks, and other medium to small picture presents." Photos used using traditional digital camera models have a tendency to be the best option for large-format presents.


Choose the best Theme

Beyond quality, the theme and content of the picture is also a significant factor to consider when presenting a picture gift. You should choose a picture that captures a particular instant and reflects confirmed vacation or occasion. Listed below are ideas for choosing the perfect picture for someone in your daily life:

Birthdays: If someone you understand is celebrating a birthday and you also want to provide them a really unique gift, provide them with a photo present that reminds them of these who love them or a particular amount of time in their lives. You can provide them a picture from a get-together with friends, or a picture of a recently available vacation. You can also choose two different photos - perhaps an infant photo and a recently available picture - to display hand and hand.

Weddings: Photo presents are a thoughtful and fun wedding present that all your family members will treasure for a long time to come. After the wedding photos are for sale to purchase, you may use someone to feature on the blanket, pendant, or pillow. You can even proceed through your own photos and find out if you have any candid photos of the happy few as a particular surprise.

Anniversaries: For lovers celebrating a standard anniversary, consider providing them with a photo present to commemorate the occasion. Wedding photos are a great choice; you might give each individual their own present having a portrait or candid picture of their partner. You can even choose a picture from a memorable holiday.

Graduation: For the graduate in your daily life, give them a photograph present to celebrate their greatest success. Choose a picture that will remind them of their own time in college, perhaps a picture with friends, a course picture, or a graduation portrait.

Pet Adoption: That is an excellent occasion that's often overlooked as it pertains to gift-giving. A fresh dog is the best present! But it's an excellent opportunity to shock the proud new owners with a present that captures as soon as. Take a picture of their new family pet - get it done on the sly when you can - and present them a present showcasing the image.

An Ideal Gift

With a multitude of custom gifts to choose from, there's room to have a great time and become creative with the procedure. Make sure to take a lot of photos which means you have many to choose from for every occasion. Be it a birthday, any occasion, or "because", a picture gift or picture blanket is the perfect way to talk about recollections with someone you like.


Senin, 17 September 2018

How to Recover Deleted Photos From Sigma Digital Camera

- Tidak ada komentar
 How to Recover Deleted Photos


Sigma is an organization established in 1961 and specialized in neuro-scientific manufacturing digital camera models, flashes, lens and other accessories about picture taking. After almost 40 years of development, Sigma has gained well-earned reputation because of its originality, advancement and command in the world's innovative type of photographic products especially digital camera models. Sigma digital camera models are in the type of best value which really surprised most of its users. And lots of happiest and exciting photos are captured right with Sigma camera.

If you want to recuperate deleted digital photos from Sigma camera?

Even Sigma has offered us with best photography technology and optical options, it cannot eliminate individual errors whenever we are employing Sigma camera to consider photos. Human mistakes such as unintentional deletion or format without burning photos, for example, you have purchased a fresh Sigma SD14 camera and used a lot of digital photos while venture out journeying with family. Abruptly the camera Sdcard has gone out of space therefore you have to delete some photos to be able to go out even more free space for new photos. Which means you erased some that look not nice, but back found other nice photos were also removed credited to your mistakenly working. In cases like this, might it be possible to recuperate erased photos from Sigma camera?

Another scenario you may want to recover deleted digital photos from Sigma camera. As we realize all the photos we take with Sigma camera are stored or kept on memory credit cards such as SD, SDHC, MMC, and CF storage cards. Sometimes whenever we put in the camera memory space card to your laptop or computer to back-up all the valuable photos in case there is emergency, the machine cannot understand your camera storage credit card properly and asks you to format it. You follow the teaching without considering too much and format your Sigma camera memory space card, the effect is all of your valuable digital photos are removed. Any way to recuperate such erased photos from my Sigma camera storage card?


Why deleted digital photos can be recovered from Sigma camera?

Regardless of your digital photos are removed credited to mistakenly procedure or accidental format, all the erased digital photos can be recovered from your Sigma camera memory space card. As a matter of fact, when you delete the digital photos from your Sigma camera storage card, the removed photos aren't actually deleted completely. You just delete the associated admittance and the picture data remain saved in the initial areas of camera memory space card disk. A very important factor different is those data space is proclaimed as designed for other new data to create over or take up.

Formatting camera is also similar court case. When you format the camera storage cards, all the picture information is not erased completely just the document system erases the info about where those picture data are allocated and what size will be the data etc. And all of your removed digital picture data still rest there waiting around to be occupied. In order we can easily see, whenever your delete or format digital photos from camera, so long as the erased digital picture data aren't occupied or overwritten, it is highly possible so that you can recover those removed photos.

How exactly to recover deleted digital photos from Sigma camera?

The ultimate way to recover deleted digital photos from Sigma camera is to try some picture recovery programs. Because they will apply specific advanced data algorithms to investigate the camera memory space card to consider the lost picture data, once found it is rather easy to recuperate the complete photos.

Wondershare Photo Recovery is undoubtedly kind of advanced picture recovery program to recuperate deleted photos from Sigma camera. With deep scan and preview functions, it can recover your lost photos from camcorders at great relieve. Sigma surveillance cameras types like Sigma SD14 and SD15 Digital, Sigma DP1 and DP2 Small series are supported. This picture recovery program comes in almost all Home windows platforms including Windowpane 7, Vista, XP etc. Besides, additionally it is a video recovery program to recuperate erased videos and sound data files from Sigma camera.

One more suggestion you have to treatment: whenever your digital photos are deleted from Sigma camera, do put your Sigma and the camera storage credit card in safe place , nor try to take more photos. Because physical harm and data overwritten can make your removed digital photos unrecoverable despite having the best recovery program.


Minggu, 16 September 2018

How to Conserve Photos and just why It's So Important

- Tidak ada komentar
How to Conserve Photos

This article offers you tips to help you preserve any photos you have from Facebook photos to any other personal photos that you print. It will offer you instructions for how to store photos for preservation.

I want to first start with some short advice about how to help protect your photos even before you printing them. Contrary to popular belief there are actions you can take before you printing your photos that are just as important as the ones you take after.

First, ensure that you are printing your photos from a specialist photo computer printer. The chemicals and paper that are used are designed to have longevity and keep maintaining the grade of the printing. Photos imprinted on real picture paper using real picture paper handling can last up to a century when subjected to light and 200 years when stored at night. Second, printing two copies of each photo, someone to screen/enjoy and someone to preserve. This enables you to store another duplicate of the picture to safeguard it from harm and keep it for future decades.

The very first thing to keep in mind is you want to store photos in an awesome, dark, dry place with low humidity. The temperatures at which you retain your home should be fine. Never store your photos within an attic, basement, or other area where in fact the heat range isn't regulated. Extreme hot and cool may damage photos. Also, these areas will have pests, mice, and other critters that could easily get to your photos and harm them.

Because they are photos you will store, take care not to expose these to the essential oil on your fingertips by coming in contact with them. Additionally you want to store them as quickly as possible once they are published to avoid the deposition of dirt or any other particles.


Storing Photos

As mentioned above, you want to ensure that you will be selecting the proper environment to store your photos. Next, choose a storage space package that is acidity and lignin free. This can help with preservation.

If you wish to label or identify the trunk of your photos then be sure you use the correct pen. Usually do not use pencils or ballpoint pens. Make use of a sensed suggestion marker to carefully write on the trunk of your designs. Place each picture between a bit of acidity free paper designed for keeping photos. Do not forget to place paper outrageous photo before shutting the box.

Reasons to Store Copies of Photos

I understand that it could appear tedious and redundant to store a supplementary duplicate of your photos, and it's really understandable unless you wish to accomplish this for each photo you printing. However, any picture that you would like to keep as a storage for yourself or future years must be stored and conserved properly.

PLEASE, do not assume that your photos will be stored digitally! Computer systems crash, people deactivate their Facebook accounts, and technology is always changing. You're better off to conserve them yourself. You can also store them in a safe deposit container at your standard bank or fireproof safe your own house.

Finally, it may seem that storing photos within an album or a frame is preserving them, but that's not the case. Image albums tend to be made of severe glues and chemicals that will harm your photos as time passes. Photos can also adhere to the cup of structures and plastic material coverings of albums.


Senin, 03 September 2018

Trick on Mastery Google Photos

- Tidak ada komentar
Google Photos is one particular service among other services such as Dropbox, One Drive, and Flickr that automatically backup your photos. Each one of these services come in convenient in providing fast access to your photos on any device. Nevertheless, only Google Photos will give you true unlimited support of your photos. It is because unlike the other services, Google Photos has a great deal of features that the others don't have. For example, the capability to automatically remove duplicated pictures, storing your photos at high res free of charge and an inbuilt tagging icon among others. Although Google Photos is not in existence for a long period it is one of the quickest growing services with presently over 500 million energetic users.

In just as much as Google Photos supplies the best regress to something easier services, any user needs to be conversant with all its features for effective services. Listed below are 15 handy techniques to understand Google Photos:


1. Turn off mobile data

This is needed for smartphone users that don't possess unlimited data. Many users use Google Photos never to only online backup existing photos on the cams but also automatically backup images which were taken on the smartphones. Because of this, it is very important to carefully turn off support over mobile data and also permit the Google Photos application to only regress to something easier if you are charging your telephone to safeguard your electric battery life.

2. Upload old photos

For you yourself to save more storage space it's important to upload your old photos to the Google Photos Library. That is an easy process that only entails dragging and falling the photos from your exterior storage space. In the collection, the photos can look predicated on the time they were used hence, which makes it easier so that you can locate them if you want to. Your connection will regulate how long the uploading process will need.

3. Release more space on your phone

To get an user lacking any SD card or a phone with unlimited storage, it's important to regularly release space on your device. Google Photos will this effectively by simply tapping at release device storage space in the configurations menu. That is a safe process because even though the supported photos will be removed you can always gain access to them if you are linked to the internet.

4. Label your photos

Labeling individuals in your photos will come in handy in the foreseeable future. It is because you can simply identify them by looking by their name in Google Photos. This helps it be simpler to find every picture of the individual you are interested in. It also helps you to save time particularly when you are in a rush.

5. Get free unlimited storage

Google Photos offers unlimited storage space with a caveat. It only offers no more than 16 MP resolution. This is tricky while conserving videos and photos at their original quality because they'll consume into all the area that there surely is. To resolve this it is very important conserving your photos and videos at high-quality. This majorly can help you release some space.


6. Edit and save your valuable photos

Google Photos comes with an option to edit your photos to the required look you're after. This feature gives you to include a history color, crop among others. You can certainly remove what you do not want on your videos or images. It really is, however, important to save lots of the images once you edit them.


7. Remove geolocation

Images and videos were taken by your mobile phone nowadays have a great deal of location information on them. That is best for your storage space because you'll want to keep in mind all about the facts. However, Google Photos uses such information to positively map out where your pictures were used. This isn't good because you don't want people observing or getting these photos knowing wherever they were used, specially when you talk about via emails. Because of this, it is advisable to remove geolocation.

8. Support photos from other apps

Google Photos not only backs up the photos you undertake your tablet or smartphone. They have a feature which allows you to online backup your photos in other applications such as Instagram and Facebook among others. You can simply choose which devices to allow back through to the configurations menu.

9. Animate photos

That is another simple trick which makes your picture gallery a lot more entertaining. The capability to create collages, slideshows, computer animation, and films from your photos becomes very easy. All you have to is to utilize the 'helper section' where you get credit cards of suggestions to make different animations or collages. This Google car creation makes picture editing exciting.

10. Tests your search option

It's important to comprehend how to utilize this. It will come in handy if you are looking for videos and images that act like what you are interested in. Play with the search option but only search in the Google Photos using common and obscure brands.


11. View your photos and videos in Google Drive

That is one of the tricks that anyone using Google Photos ought to know. You can certainly view your photos and videos through the photos user interface. This feature will come in handy particularly if you currently have a great deal of text message on your Google Drive.

12. Send videos to YouTube

That is another trick which makes sharing of videos without headaches. Google Photos comes with an option to transfer photos and videos right to your YouTube route. It also provides option to include a name, to tag and also to share them.


13. Make tales from photos

This feature makes Google Photos very interesting. The tales tend to be like led albums which have captions. That is easily done through mobile apps. The procedure requires selecting relevant pictures, adding captions and locations to provide more information.


14. Change your view

Changing your view mostly consists of zooming in and out to see your images better. That is sometimes done by making use of your two fingertips. However, Google Photos provides a less strenuous option to do the same. The service gives you to improve the view of the mobile application to get an appropriate view.


How to Conserve Photos With Image Restoration

Photo repair is only preserving old recollections and passing on the lovely memories to another generation. Photos are taken up to captu...